Appendix B — Additional Software Set-up
B.1 How to clone a GitHub repository into RStudio
B.1.1 In RStudio Cloud
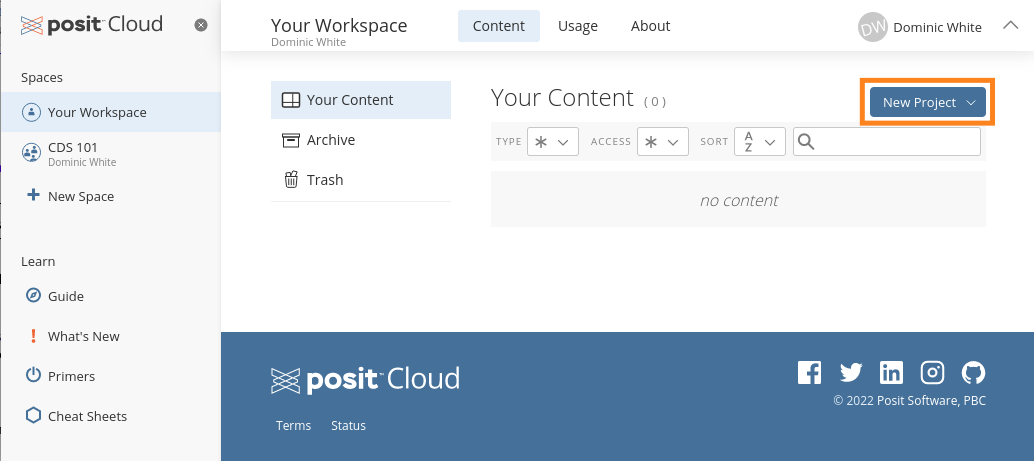
- From your homepage, click on the New Project button in the top right of the screen (Figure B.1)
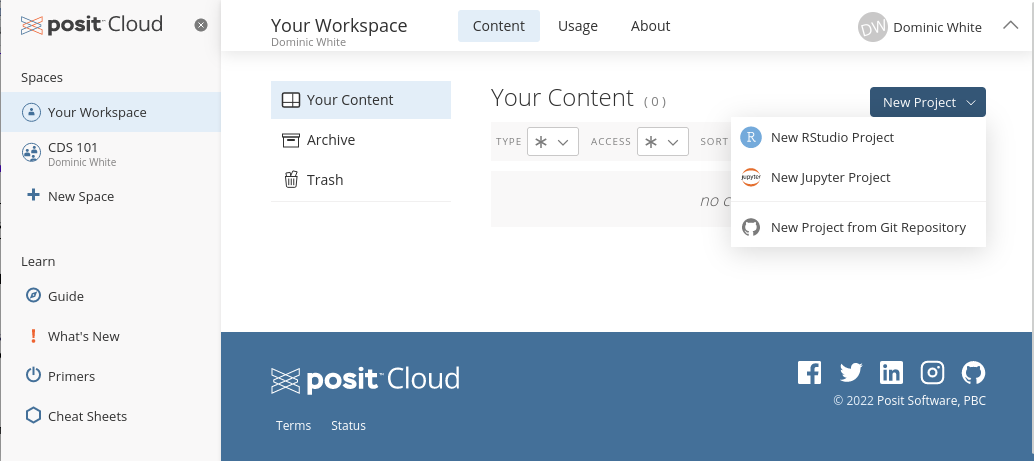
- In the drop-down menu, click on the option that says “New Project from Git Repository” (Figure B.2).
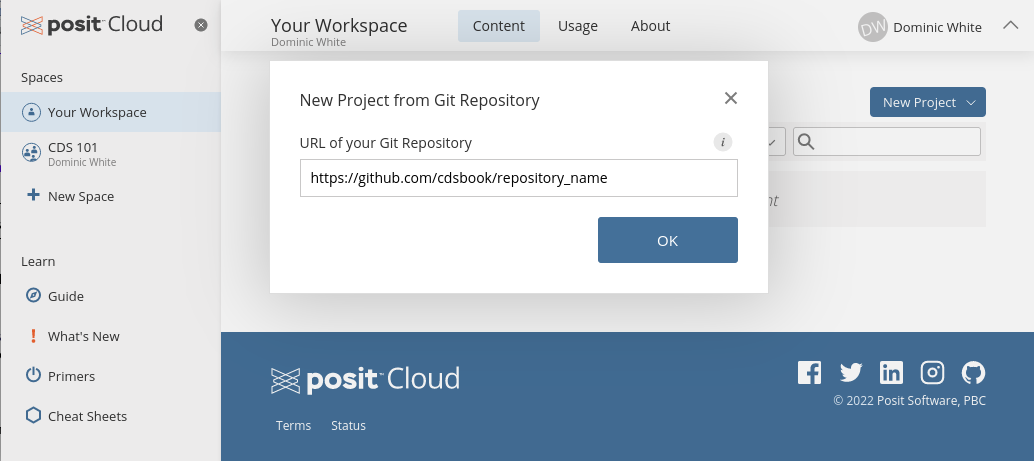
- In the pop-up window, paste in the URL (web address) of the GitHub repository that you wish to open in RStudio (Figure B.3).
B.1.2 In RStudio Desktop
Click on the New Project option in the Files dropdown menu).
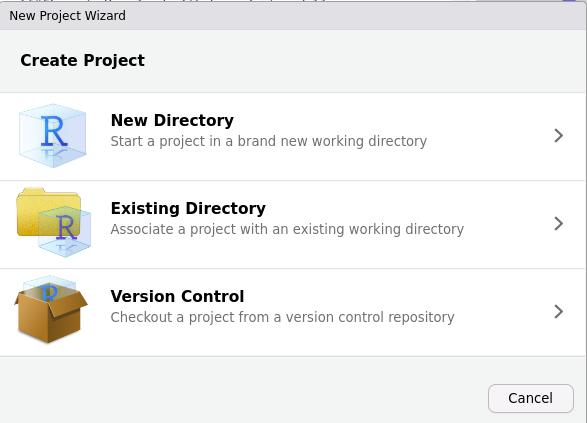
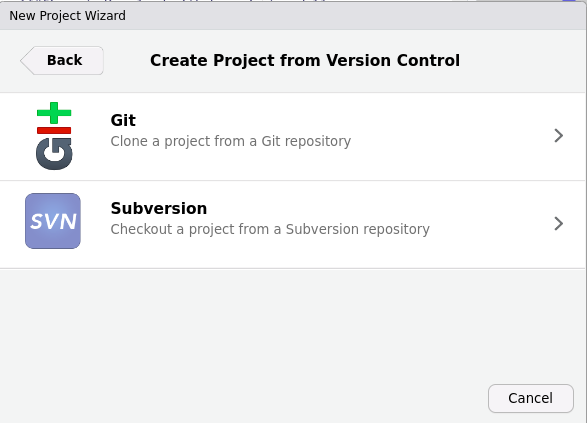
In the New Project wizard that pops up, click on the option that says “Version Control” (Figure B.4)
- On the next page of the wizard, click on the “Git” option (Figure B.5)
- On the final page of the wizard (Figure B.6), fill in the details for the GitHub repository you wish to “clone” (i.e. download), and where to download it to:
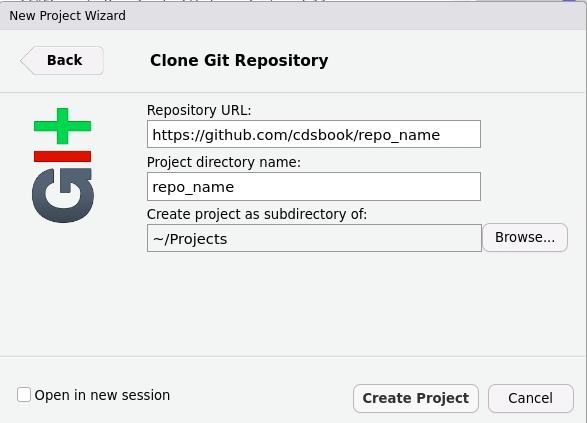
In the first field (“Repository URL”) copy-and-paste the web address of the GitHub repository’s homepage.
The second field will be the name of the folder created on your computer to hold all the files you are downloading from the GitHub repository. It may auto-fill with the repository’s name - you can also type something in, or change it to a different folder name if you prefer.
The third field is the name of the parent folder that will hold the folder above. I would recommend organizing related projects (e.g. the projects from this book) in a single parent folder so that they are easy to find. If you click “Browse” you can choose or create a parent folder to hold all your project folders.
Then click “Create Project”.
B.2 Stage, commit and push from RStudio to GitHub
If you are working on a Git-enabled project in RStudio, then you can periodically make checkpoints as you make progress on your work. Git refers to these checkpoints as commits, and we refer to this process in general as version control.
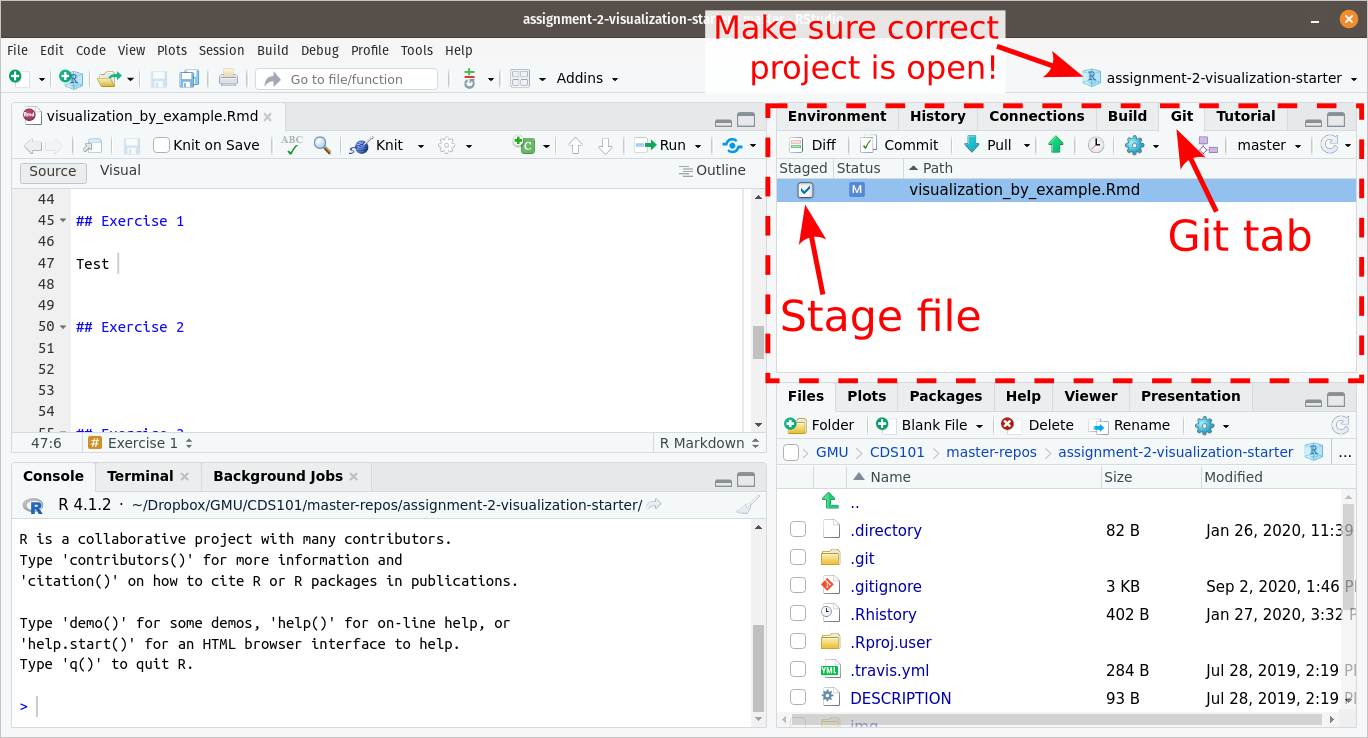
If your RStudio project is using Git for version control, then the top-right pane of RStudio will contain a Git tab.
If you do not see the Git tab, but you are expecting to see it, then either:
The most likely cause is that you do not have the correct Project open in RStudio (check the current project in the top-right corner of RStudio, and then open the correct one).
You do not have the Git software installed. This needs to be installed separately to RStudio Desktop, as we did in Section 2.4.1 of this book. If you already have Git installed, then is is possible that…
In rare cases, RStudio can sometimes not find where Git is installed on your system. This can sometimes happen after a software or operating system update on a computer. The way to fix this is by manually telling RStudio where to find Git on your computer. To do this, first locate the path to the Git program on your computer, and then open up the
Tools > Global Optionssettings of RStudio and in theGit/SVNsection, put this path in theGit executablebox.
The first thing to remember is that you can only make a new commit if you have made changes to at least one of the Project’s files since the last commit. In addition, the changes to those files need to be saved to the hard drive (because Git cannot detect the changes otherwise).
Step 1: Stage files. In the Git tab check the Staged checkbox next to any modified file that you wish to add to the next commit (Figure B.7).
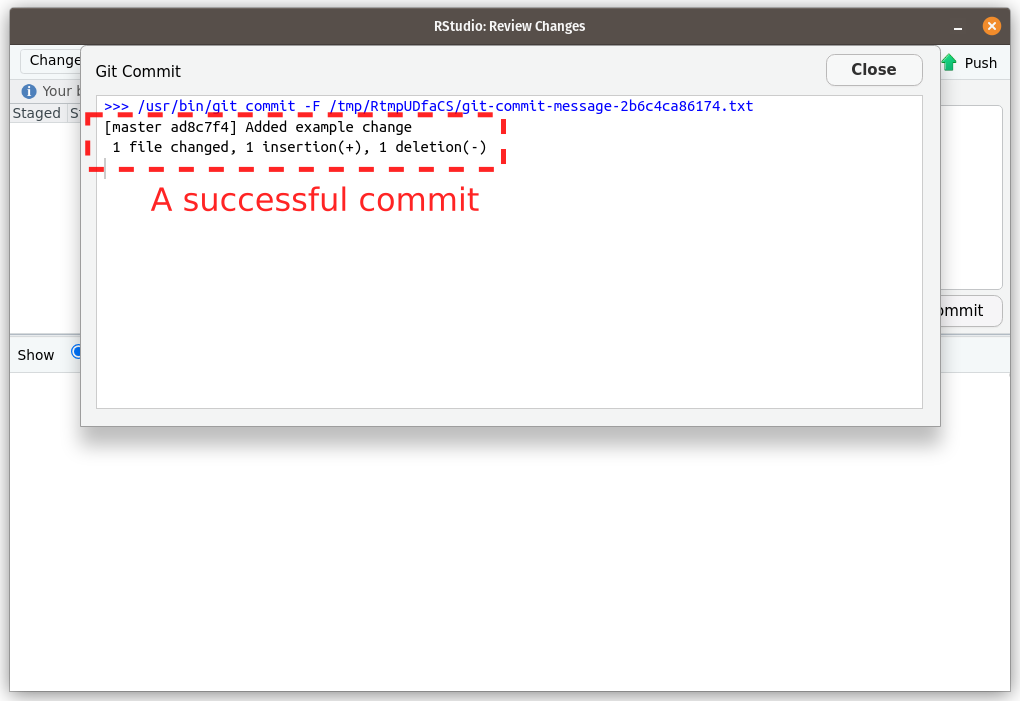
Step 2: Make the commit.: Make the commit (i.e. the checkpoint) by clicking the Commit button in the Git tab. A pop-up will appear. In the Commit message box, write a short message that briefly summarizes the changes that you made (Figure B.7). Then click the “Commit” button below the message box.

Assuming everything worked correctly, you should see another message appear that will include the commit message you just wrote along with the number of files you staged, and the number of “insertions” and “deletions” (i.e. the number of lines that you modified in those staged since they were last committed). Figure B.9 shows an example of what such a message looks like.
You may see a different message, which probably means that the commit didn’t happen successfully.
- If you get a message that says that Git doesn’t know who you are, and asks you to set your name and email, then you did not finish setting up RStudio as detailed in Section 2.5. To fix this, re-run the first two commands from that section (the two commands that begin
git config ...). Then try to commit your work again.
Step 3: Push the commit to GitHub.
Finally, we need to upload the new commit to GitHub (because it currently only exists in RStudio - thus GitHub is out-of-date, so we need to force it to sync with the new version of the project in RStudio). Git refers to this process as Pushing.
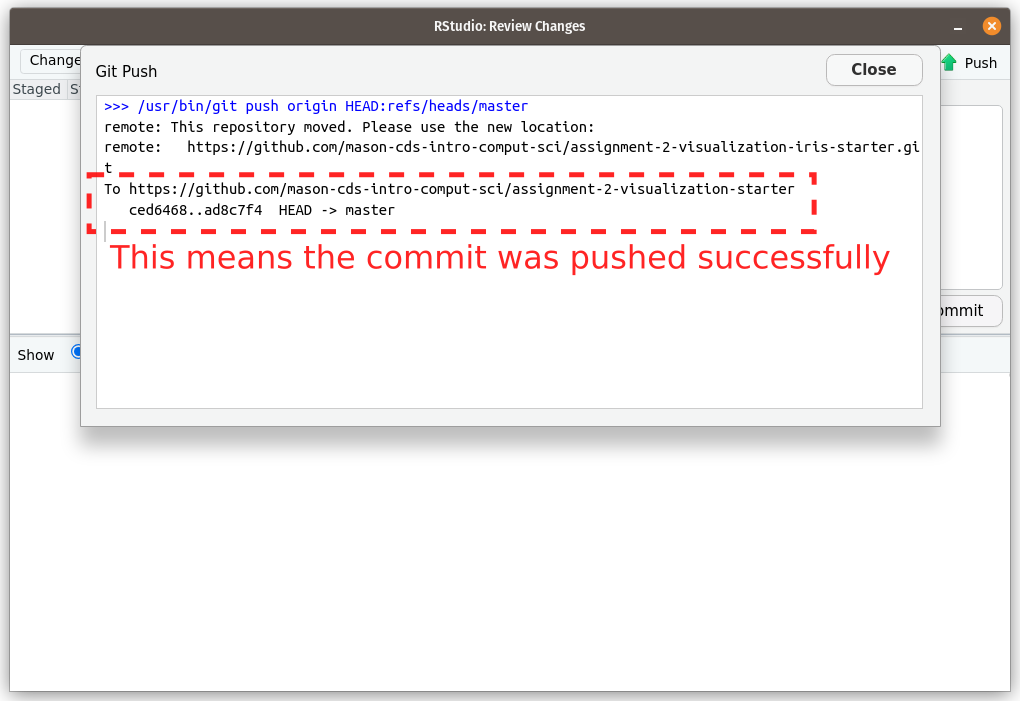
In the top of either the Git tab or the commit pop-up is a upwards-pointing green arrow labelled Push. Click this to send your work back to Github. It should just work (without asking for your Github username or password), in which case you should see a message like ?fig-rstudio-successful-push .
 If you instead get asked for your GitHub username and password, then this means that RStudio does not have a valid Personal Access Token for GitHub. To fix this, repeat the second half of the setup instructions in Figure B.9, starting with this line:
 install.packages(c("usethis","gitcreds")).
B.3 VS Code IDE Set-up
Section coming soon.